
5 Steps to Injury-Safe Agility Training: The Essential Gear Every Youth Coach Needs
by Paul Harwood
·
If you're coaching young athletes, you already know the pressure – you want them to improve, stay engaged, and most importantly, stay injury-free. Youth sports injuries are on the rise, and as a coach, you're the first line of defence. The good news? Having the right equipment in your kit can make a massive difference in keeping training safe while still delivering results.
Let's be real – you don't need a fancy sports science degree or a massive budget. What you need is smart, practical gear that helps you create a safe training environment where kids can develop agility without risking their knees, ankles, or confidence.
Here are 5 essential steps to injury-safe agility training, plus the must-have coaches sports equipment for each one.
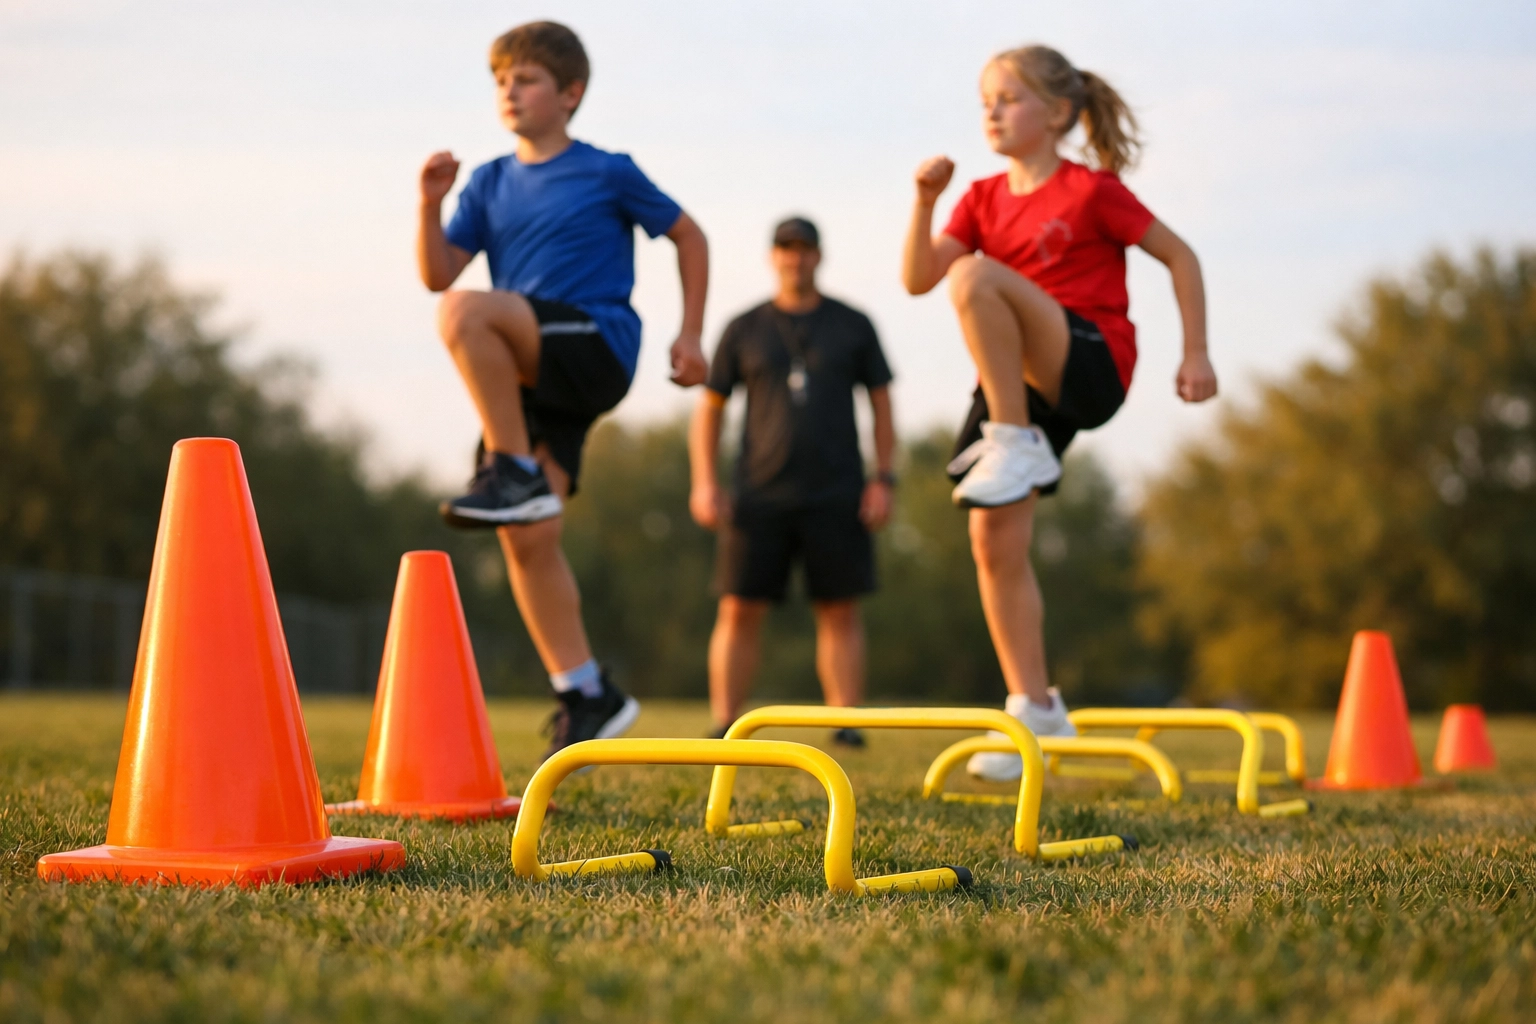
Step 1: Create a Proper Warm-Up Zone (And Actually Use It)
You've seen it happen – kids rock up to training and want to dive straight into drills. But skipping warm-ups is like trying to sprint in frozen trainers. It's asking for trouble.
Why this matters: Cold muscles and stiff joints are injury magnets. A proper dynamic warm-up increases blood flow, improves flexibility, and gets the nervous system firing. It's not optional – it's essential.
The gear you need:
- Agility cones or markers – Set up a dedicated warm-up circuit that's separate from your main drill area. Use bright cones to mark stations for high knees, butt kicks, and lateral shuffles
- Mini hurdles (6-12 inches) – Perfect for controlled stepping drills that activate hip flexors and improve range of motion without the impact of full-height jumps
- Resistance bands – Light bands help activate glutes and hip stabilizers, which are crucial for preventing knee injuries during directional changes
Pro tip: Make your warm-up visual and consistent. Set up the same cone pattern every session so kids know the routine. It takes 5-10 minutes max, but it can prevent weeks of injury recovery.
If you're looking for quality team training equipment that won't fall apart after a few sessions, check out Rapid Sports' team training collection – built for grassroots coaches who need gear that lasts.
Step 2: Build Movement Foundations with the Right Tools
Here's where most coaches rush things. There's pressure to make training "intense" or "competitive," but with youth athletes, technique always comes before speed. Always.
Young athletes haven't fully developed their neuromuscular coordination. Their brains are still learning to control their bodies during rapid movements. Push too hard too fast, and you get compensatory movement patterns – basically, bad habits that lead to injuries down the line.
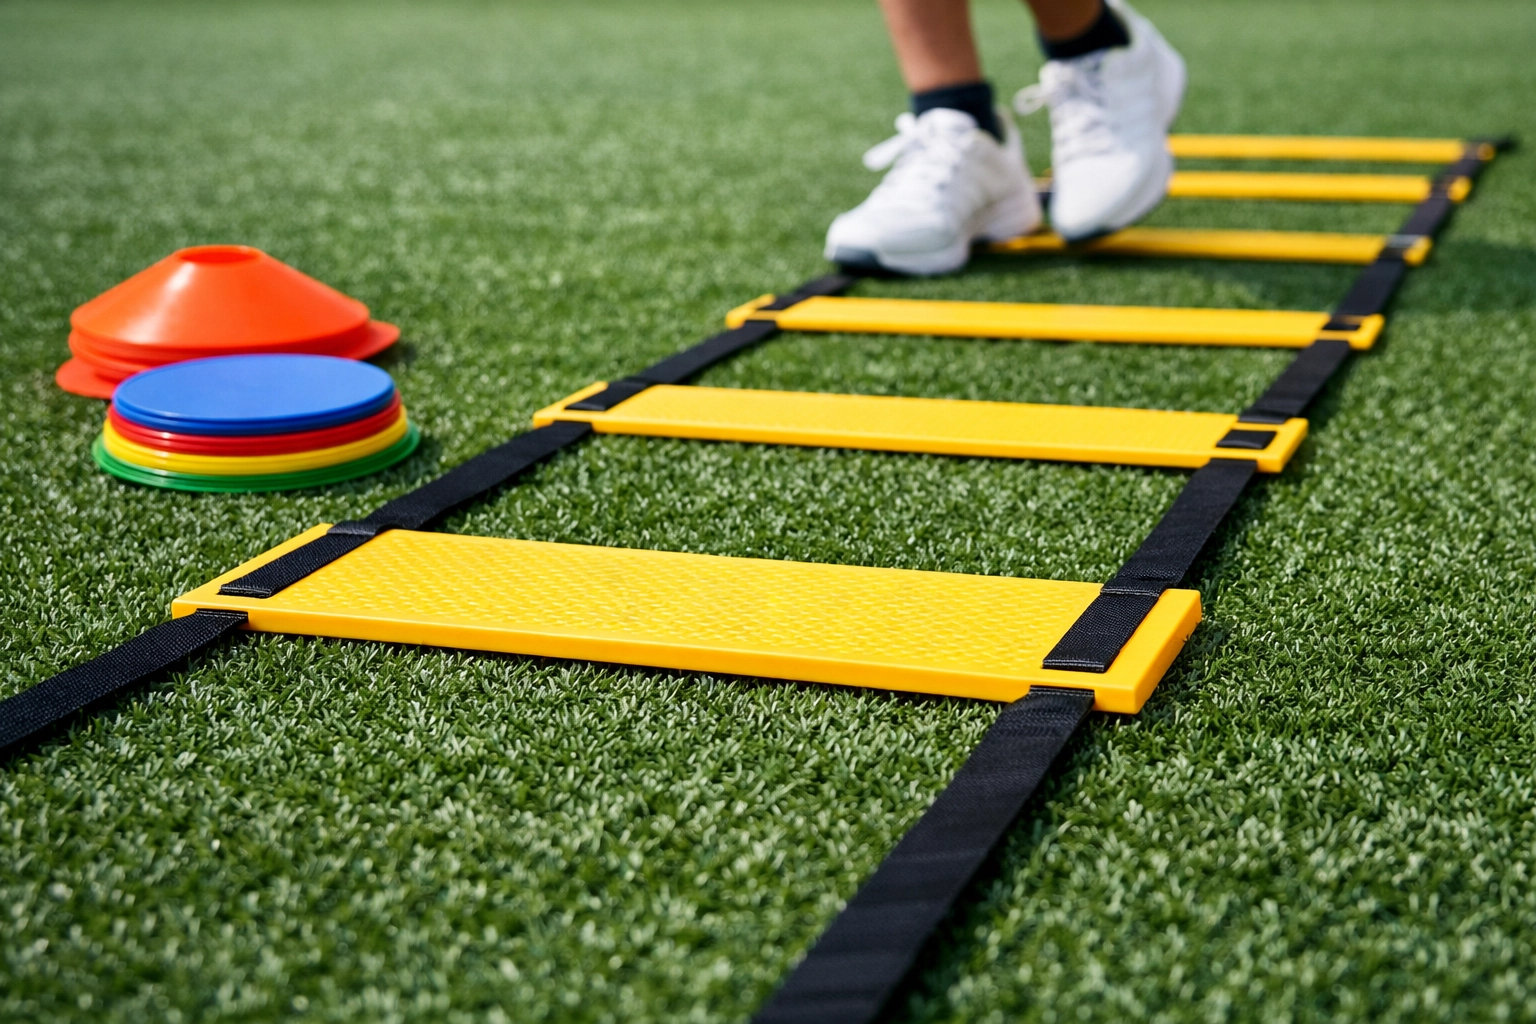
The gear you need:
- Speed and agility ladder – This is your best friend for teaching proper foot placement, coordination, and body control. Start with slow, deliberate patterns before adding speed
- Flat training cones (not full-height) – Use these for basic footwork drills. Flat cones won't trip up young athletes who are still developing spatial awareness
- Spot markers – Simple ground markers help teach proper stride length and landing mechanics without overcomplicated setups
What to focus on:
- Proper posture (chest up, core engaged)
- Balanced landings (two feet, knees tracking over toes)
- Controlled deceleration (stopping before changing direction)
- Body alignment during cuts and pivots
Don't stress about drill complexity. A simple ladder drill done with perfect form beats a fancy sequence done sloppily every single time. Need inspiration? Our guide on how to use a speed ladder breaks down beginner-friendly patterns.
Step 3: Match Your Equipment to Their Development Level
Not all agility equipment is created equal, and what works for a 16-year-old definitely doesn't work for an 8-year-old. Age-appropriate gear isn't just about safety – it's about keeping kids engaged and building confidence.
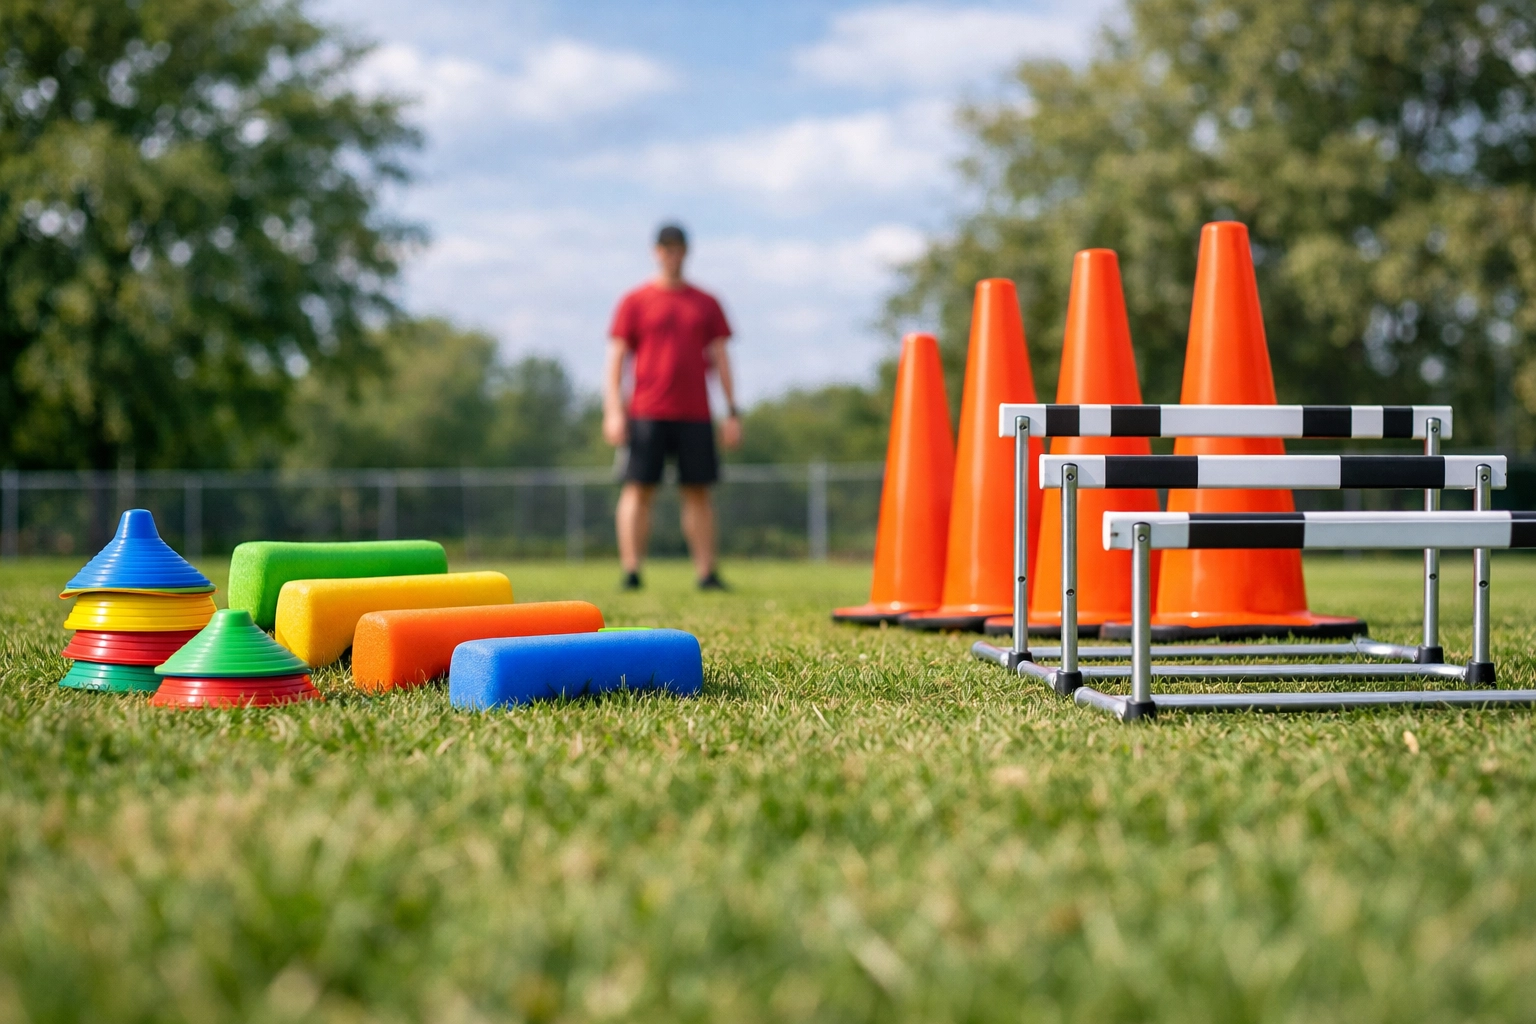
For younger athletes (ages 6-10):
- Lightweight cones (4-6 inches) – Easy to see, won't hurt if they accidentally kick one
- Soft foam hurdles – These won't cause injury if clipped, and they help build confidence in jumping movements
- Visual markers in bright colours – Kids this age respond to clear, colourful boundaries
For older youth athletes (ages 11-16):
- Full agility ladder (15-20 feet) – Longer ladders allow for more complex patterns and higher speeds
- Adjustable hurdles – Start low and gradually increase height as technique improves
- Reaction balls or light medicine balls – Adds unpredictability and sport-specific reactions
The golden rule: If your athletes can't execute a drill with good form at 50% speed, the equipment or drill is too advanced. Scale back, build the foundation, then progress.
For a comprehensive selection of agility training equipment suited to different age groups, Rapid Sports has options that won't break the bank.
Step 4: Invest in Protective and Surface-Appropriate Gear
Let's talk about the stuff that doesn't look sexy but absolutely matters – the gear that prevents injuries before they happen.
Training surface matters more than most coaches realize. Hard concrete? Uneven grass with hidden divots? Wet artificial turf? Each surface changes injury risk, especially for ankles and knees during directional changes.
Must-have protective equipment:
- Proper training shoes – Make sure your athletes wear footwear with good lateral support (not running shoes, which are designed for forward motion only)
- Knee and ankle supports – Not for every athlete, but for those returning from injury or with known joint instability
- Safety cones with weighted bases – Wind can turn lightweight cones into flying hazards. Weighted cones stay put
Surface-specific considerations:
- Grass: Use longer stakes or pegs for markers; standard cones can sink or tip
- Indoor courts: Rubber-based cones won't scratch floors or slip during drills
- All-weather: Look for UV-resistant equipment that won't crack or fade after a season outdoors
Storage matters too: Get a proper equipment bag or cart. Damaged gear from being thrown in the boot of your car isn't just unprofessional – broken cones with sharp edges or frayed ladder rungs are injury risks.
Step 5: Create Visual Safety Systems with Smart Equipment Placement
Here's what separates good coaches from great ones – intentional equipment setup that naturally guides safe movement patterns.
Think of your training area like a road system. Clear boundaries, proper spacing, and logical flow prevent collisions and confusion. When 15 kids are running multiple drills simultaneously, chaos is one poorly placed cone away.

Equipment placement strategies:
- Colour-coded zones – Use different coloured cones for warm-up areas, active drill zones, and rest/recovery spaces
- Adequate spacing – Minimum 10-15 feet between active drill stations to prevent collisions
- Clear sight lines – Position equipment so you can see all athletes from one or two coaching positions
- Boundary markers – Use tall cones or poles to mark absolute boundaries (especially near walls, roads, or drop-offs)
Pro setup tip: Arrive 15 minutes early and set up your grid before athletes arrive. This gives you time to check for hazards (broken glass, holes in the ground, etc.) and lets training start immediately when kids show up.
The visibility factor: If you're training in low light (early mornings or evenings), invest in high-visibility equipment. Some cones come with reflective strips, or you can add LED lights to key markers.
Essential Coaches Sports Equipment Checklist
Before your next session, make sure your kit includes:
✅ 20-30 training cones (mixed heights and colours)
✅ 1-2 agility ladders (15-20 feet long)
✅ 8-12 mini hurdles (adjustable height)
✅ Spot markers or flat discs (set of 20)
✅ Resistance bands (light to medium)
✅ Equipment bag or storage cart
✅ First aid kit (always, no exceptions)
✅ Water bottles or hydration station
Budget-conscious? Start with cones and one quality ladder. You can build your kit gradually, but these two items give you 80% of what you need for safe, effective agility training.
Common Mistakes Even Good Coaches Make
Mistake #1: Using damaged equipment
That ladder with a broken rung or cone with a cracked base? Bin it. It's not worth the £5 savings when a kid rolls an ankle.
Mistake #2: Overcrowding drill stations
More athletes per station doesn't mean more efficient training. It means less quality reps and higher collision risk.
Mistake #3: Skipping equipment checks
Quick 2-minute scan before each session – check for stability, sharp edges, and proper placement. Make it routine.
Mistake #4: Ignoring weather conditions
Wet grass changes everything. Adjust drills and equipment placement accordingly, or move training indoors.
Your Next Steps
Injury-safe agility training isn't complicated, but it does require intention. The right equipment creates an environment where young athletes can push themselves safely, build confidence, and develop skills that'll serve them for years.
Start with the basics – quality cones, a solid ladder, and a commitment to proper warm-ups. As your program grows, add equipment that matches your athletes' development.
You're doing important work. Every training session you run safely is an investment in a young athlete's long-term health and love for sport. The gear you choose and how you use it matters more than you might think.
Ready to upgrade your coaching kit? Browse Rapid Sports' full range of durable, coach-approved agility equipment. Because your athletes deserve gear that's as committed to their safety as you are.
