
If you’re new to coaching youth sports, you’re not alone if you feel a little overwhelmed. Between managing high-energy kids and trying to plan drills that actually stick, it’s a lot to handle! The good news is that building a solid foundation of agility and speed doesn't require a degree in sports science. It just requires the right plan and a few pieces of reliable coaches sports equipment.
At Rapid Sports, we believe in keeping things simple. Agility is the ability to move quickly and change direction with ease. For kids, this isn't just about winning games; it’s about developing coordination, balance, and confidence that lasts a lifetime. 🏃♂️💨
In this guide, we’ve put together a comprehensive checklist of tools and drills to help you lead a world-class training session, whether you’re working with toddlers just finding their feet or teenagers eyeing the varsity squad.
1. The Agility "Must-Haves" for Your Kit Bag
Before you hit the field, you need the right tools. Think of your gear as the "props" for your training session, they help define the space and give the athletes a clear visual target.
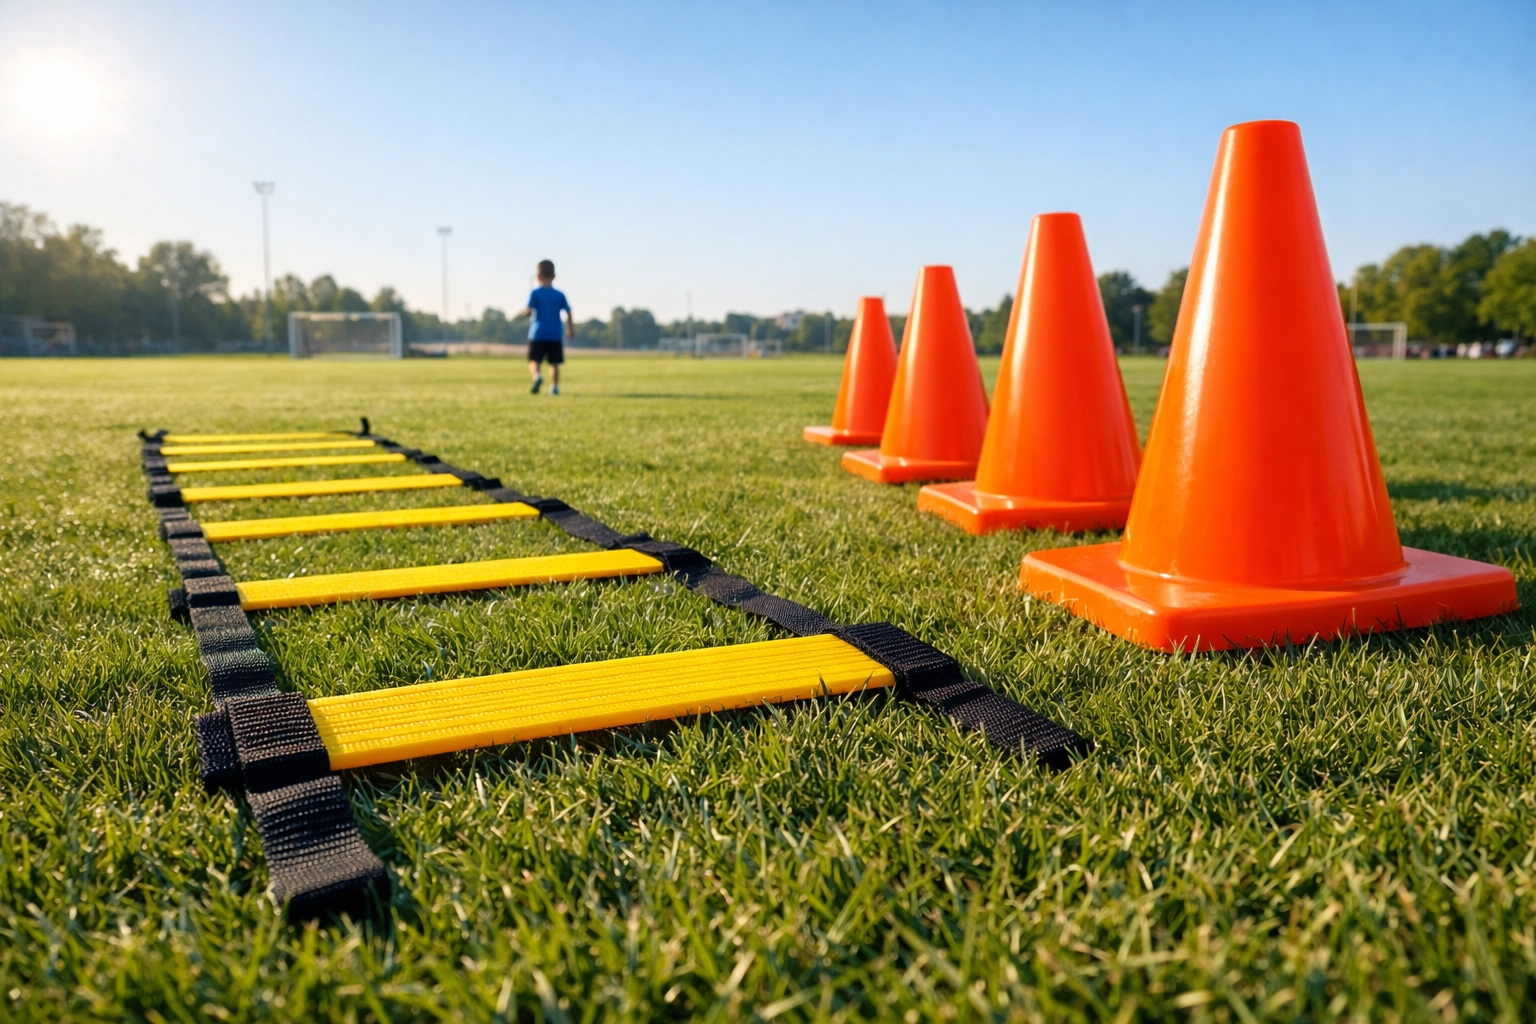
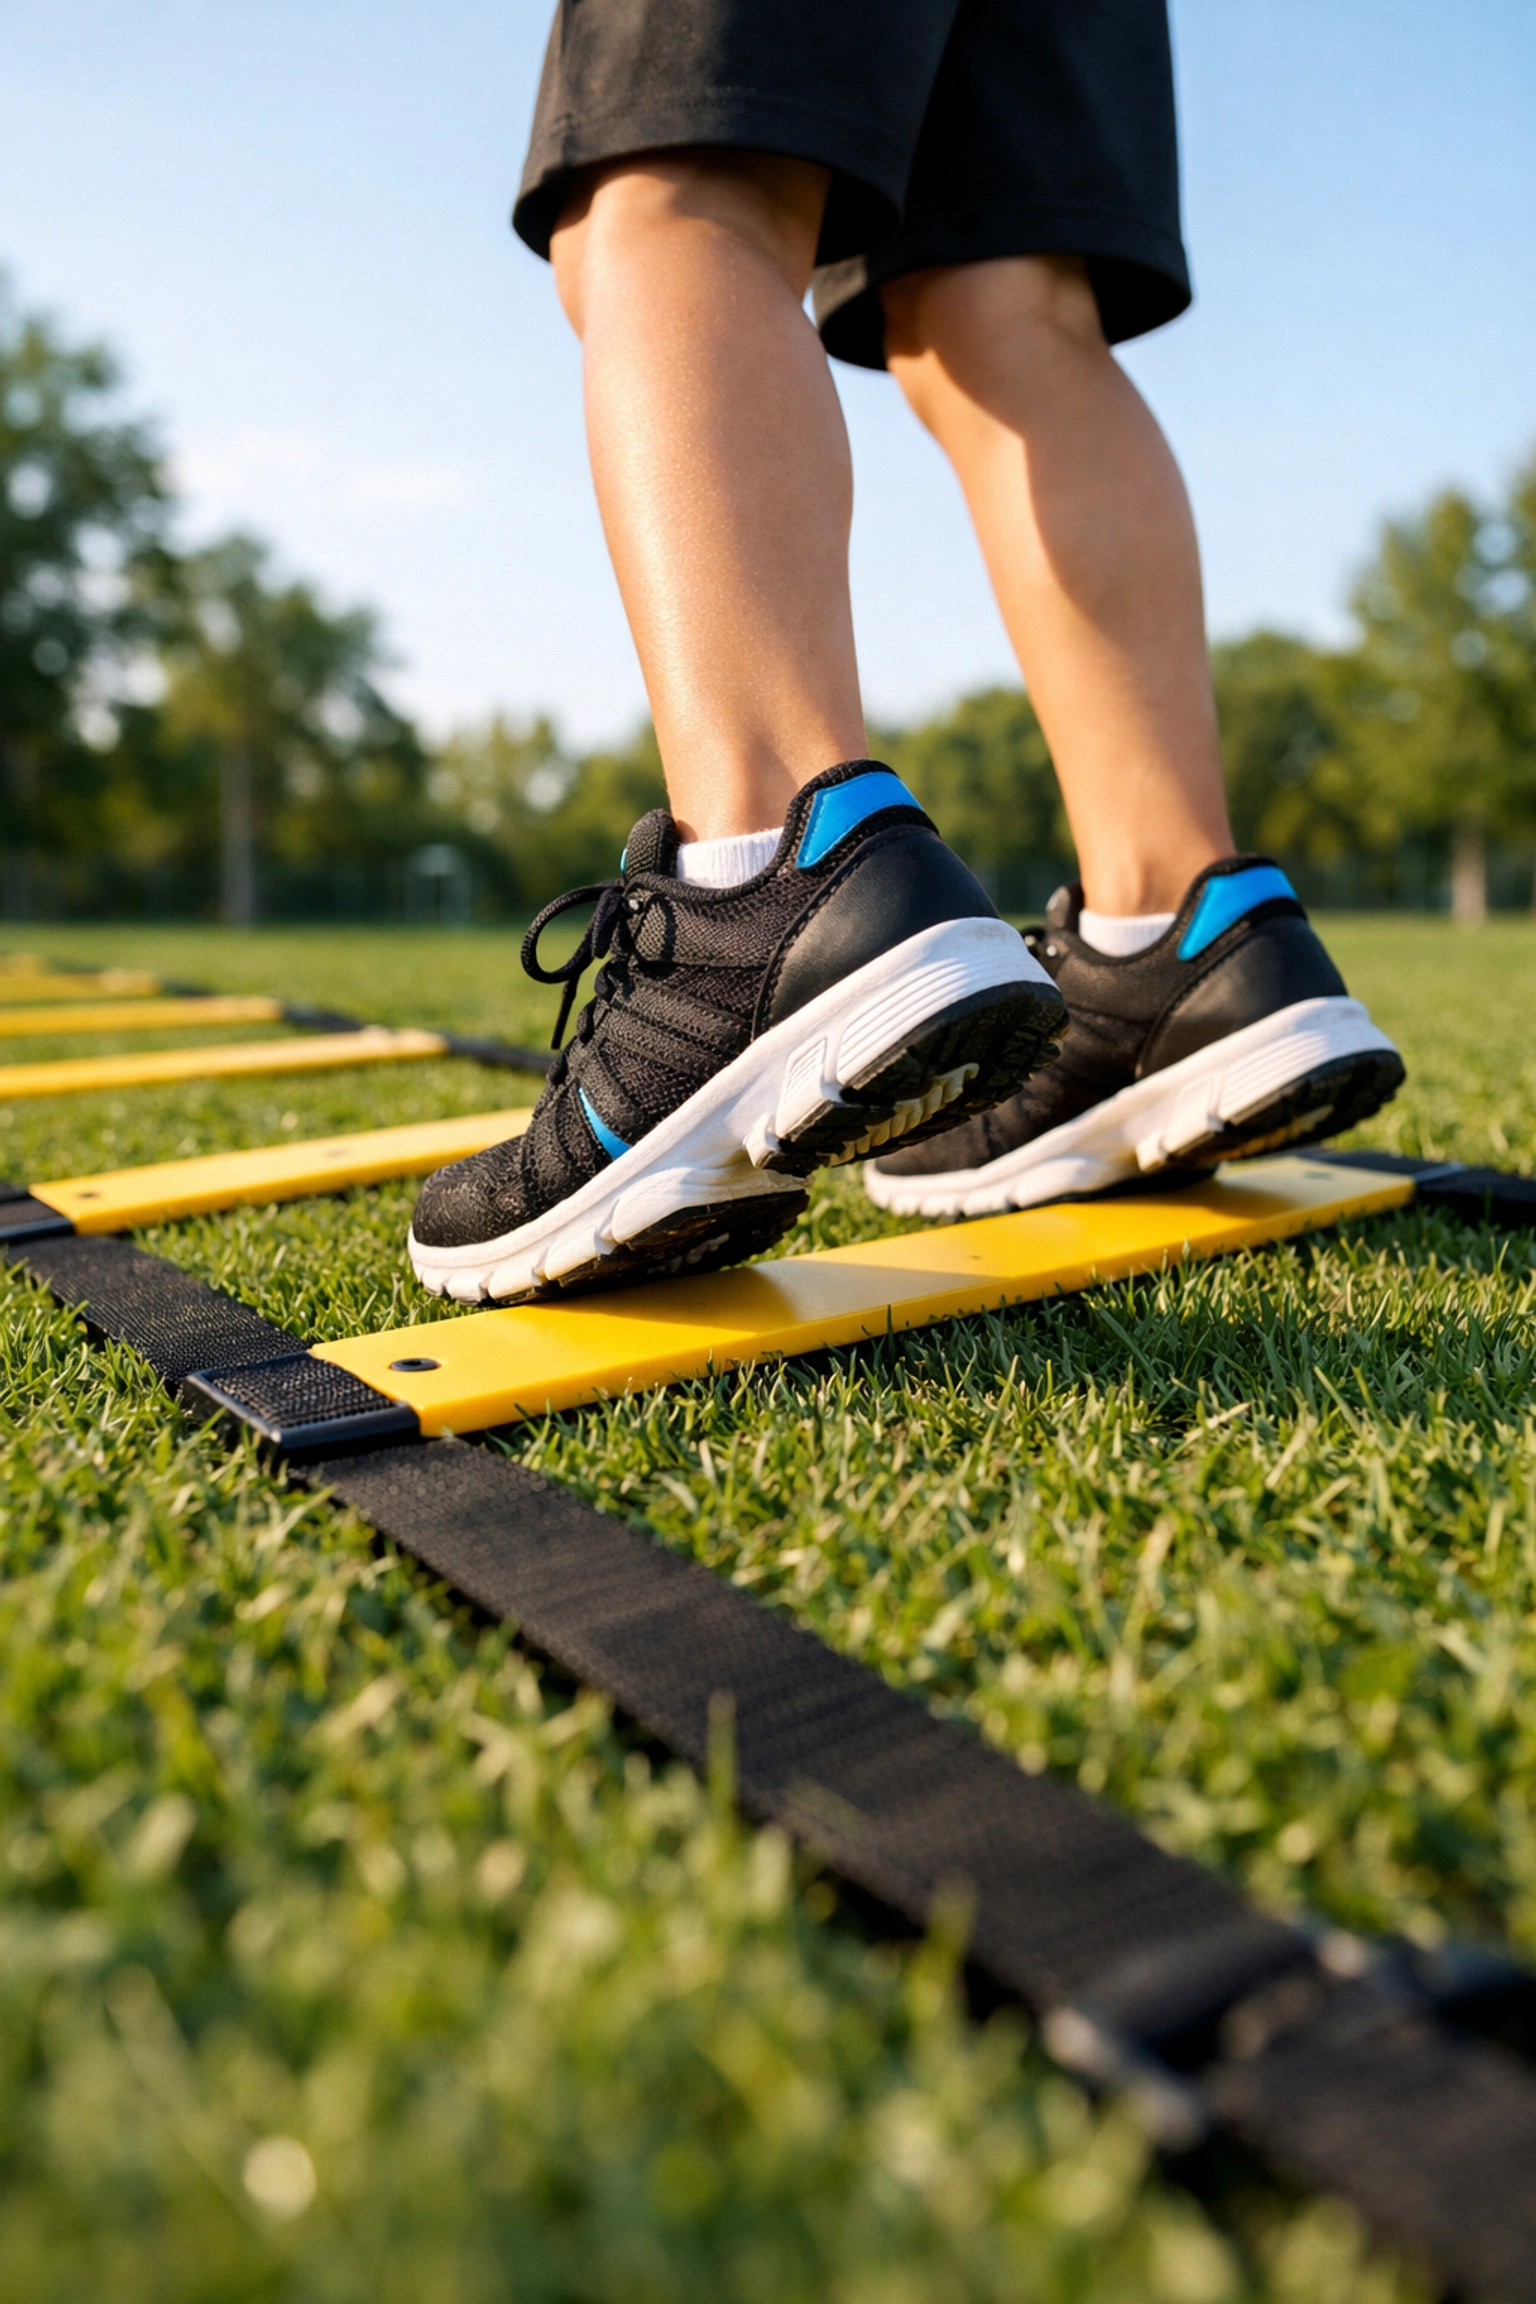
- Agility Ladders: The gold standard for footwork. The FH Speed Training Ladder is essential for teaching rhythm and coordination.
- Marker Cones: Versatile and portable. Use them to mark out boundaries, create slalom courses, or set up "bases" for games.
- Speed Hurdles: Great for teaching kids to pick up their feet. Start low (6 inches) to build confidence before moving higher.
- Resistance Tools: For older athletes, tools like the FH Resistance Parachute add a layer of "fun" intensity that builds explosive power.
- Skipping Ropes: A classic for a reason. A simple FH Skipping Rope builds ankle stiffness and cardiovascular endurance simultaneously.
2. Age-Appropriate Training Progressions
Not every drill is suitable for every age. If you try to teach a 6-year-old complex T-drills, you’ll lose their attention in seconds. Here is how to break it down:
The Foundation (Ages 5–8)
At this stage, it’s all about FUN and basic movement patterns. Focus on:
- Learning the Patterns: Teach them how to skip, hop, and crawl properly.
- Animal Walks: Use "Bear Crawls" or "Frog Hops" to build total-body strength.
- Visual Cues: Use brightly colored cones. Tell them to "run to the blue cone" rather than "run 5 meters."
The Skill Phase (Ages 9–12)
This is the "Golden Age" of motor learning. Their brains are like sponges!
- Rhythm and Coordination: Introduce the Speed Ladder with specific patterns (In-In-Out-Out).
- Lateral Movement: Focus on "Skater Hops" to build single-leg stability. Think of it like jumping from one side of a puddle to the other.
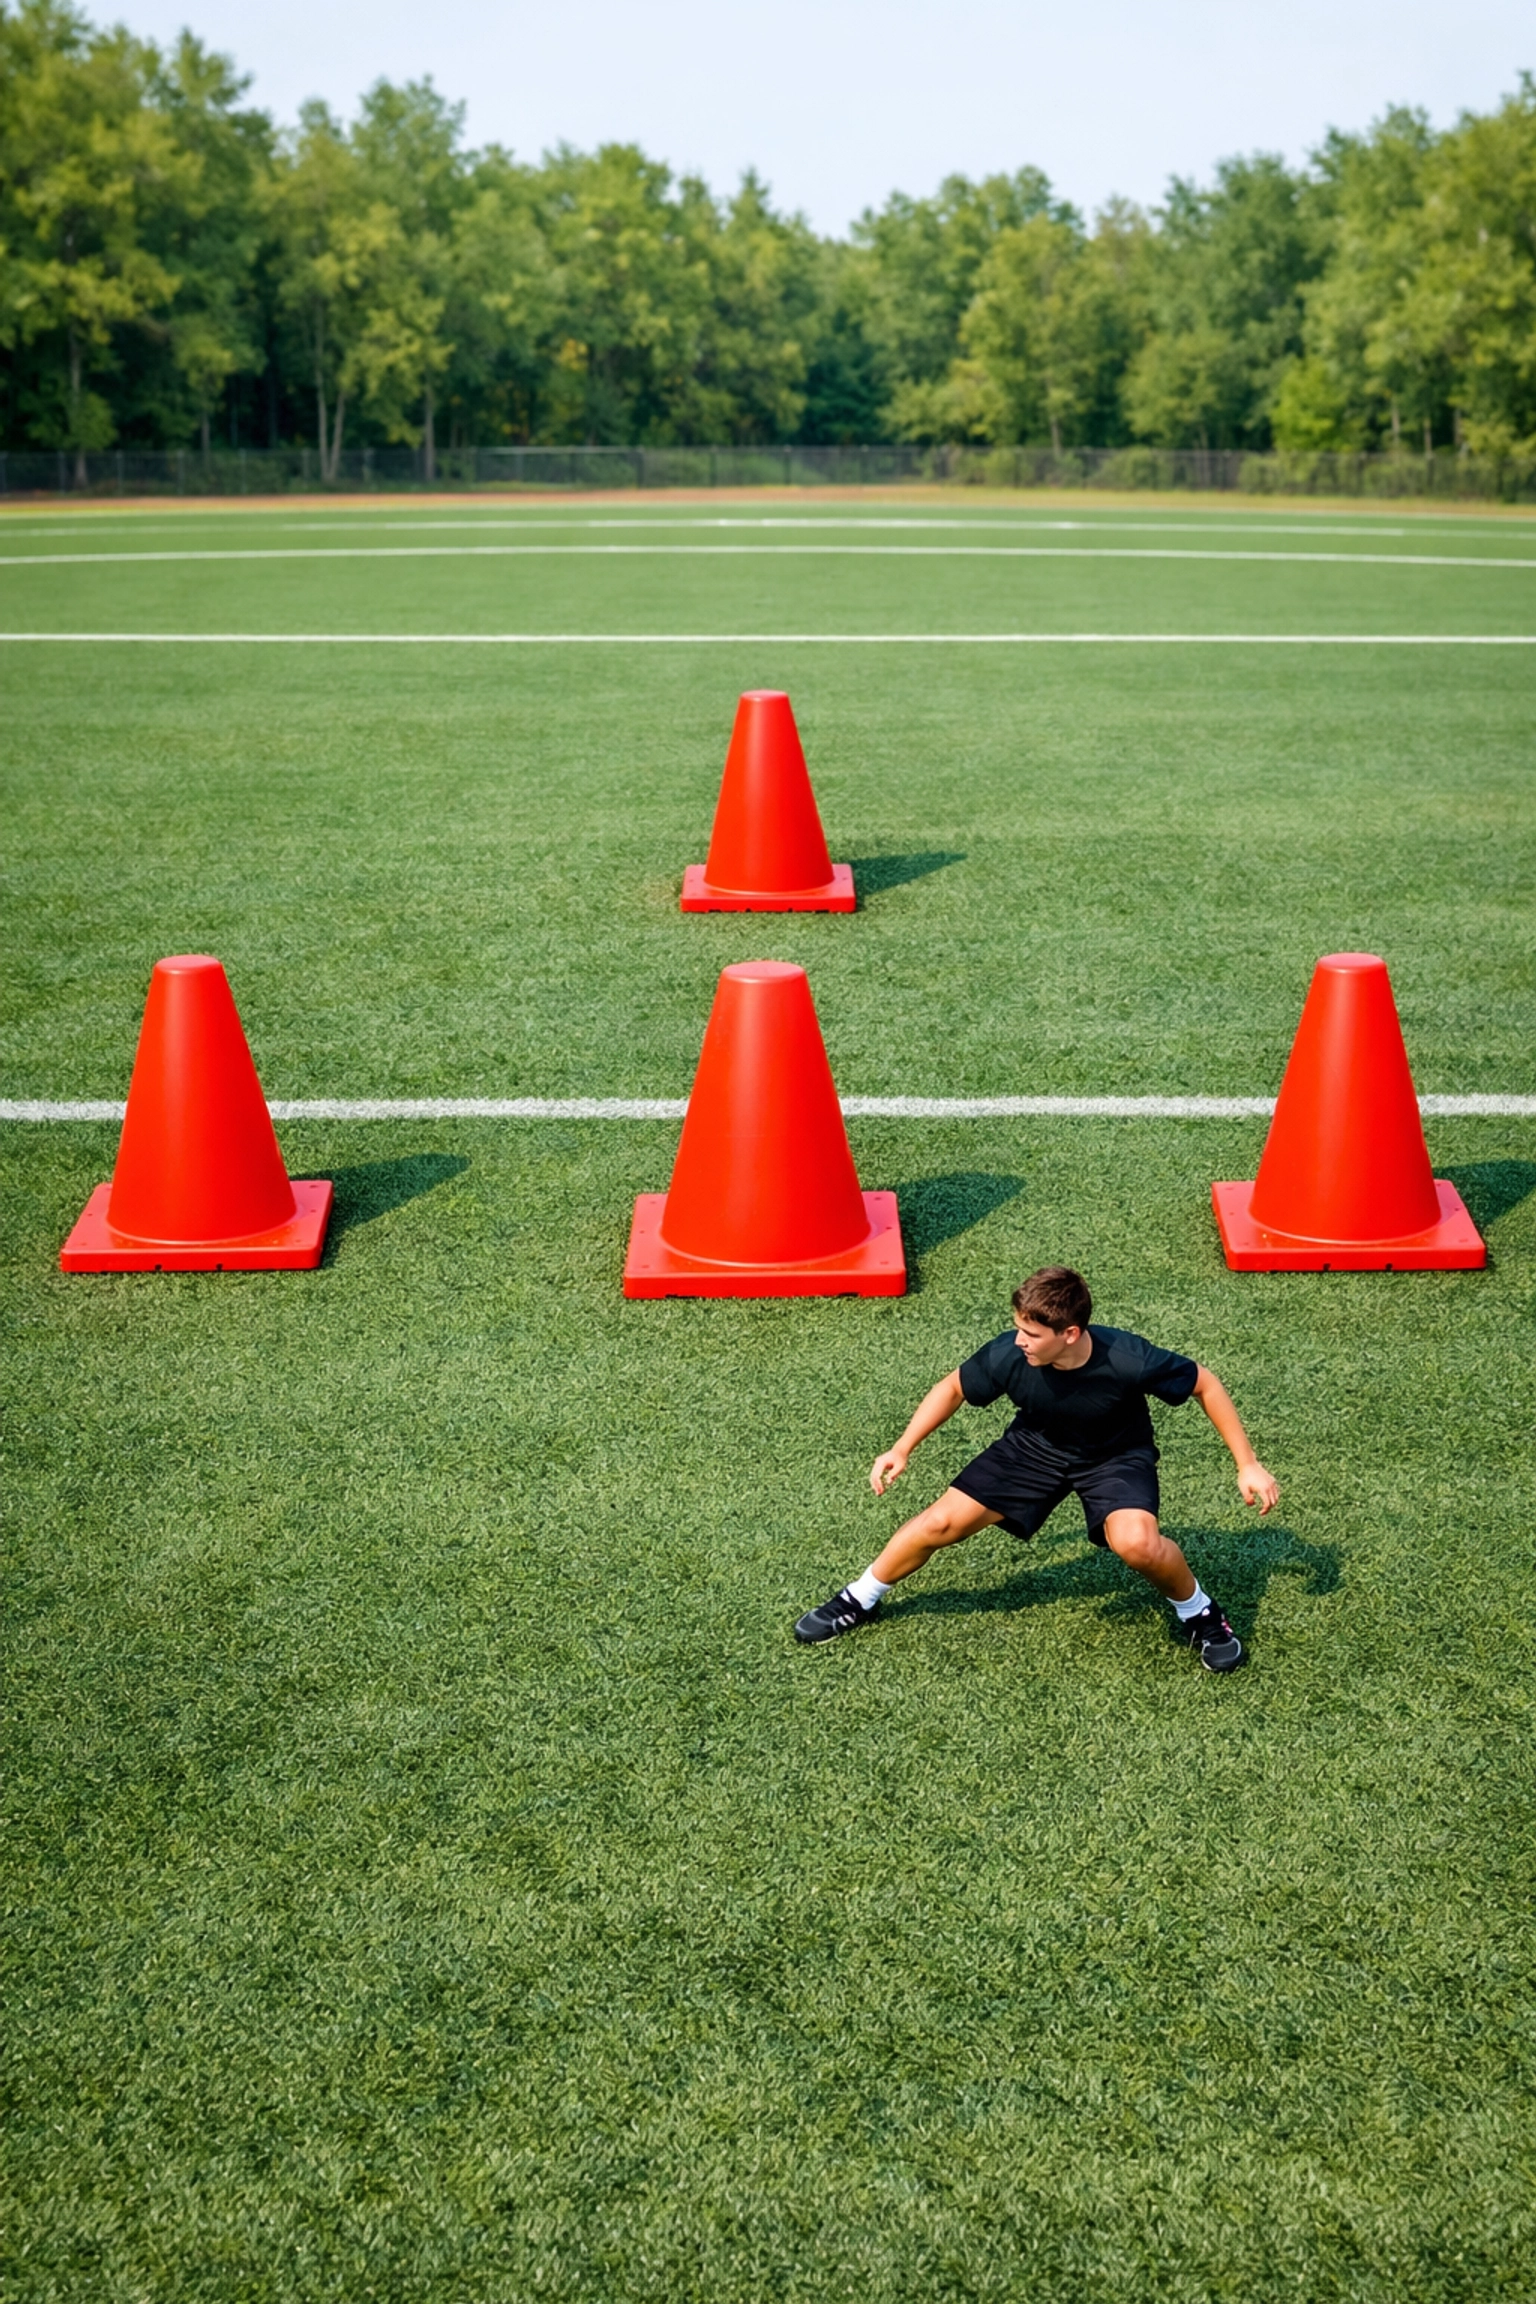
- Direction Changes: Introduce simple zigzag runs using cones spaced 3-4 feet apart.
The Performance Phase (Ages 13+)
Now we start adding "load" and "reaction."
- Reactive Drills: Instead of following a set path, have them react to your whistle or a hand signal.
- Speed Mechanics: Focus on the "drive phase" using a Harness Speed Trainer.
- Strength Integration: Incorporate Heavy Resistance Bands for lateral walks to strengthen the hips.
3. The Pre-Training Checklist
A great session starts before the first whistle blows. Use this checklist to ensure your environment is safe and productive:
- Safety Sweep: Check the grass or floor for debris, holes, or slippery patches.
- Dynamic Warm-Up: Spend 5–10 minutes on jogging, leg swings, and arm circles. Avoid static stretching (holding a stretch) before the workout; save that for the end!
- Instruction Check: Keep your "talk time" under 60 seconds. Kids learn by doing, not by listening to long lectures.
- Equipment Spacing: Ensure drills are spaced far enough apart that kids won't collide. For sprints, allow 10-20 meters of clear space.

4. 3 Essential Agility Drills to Try This Week
Ready to put your agility training gear to use? Try these three staples:
Drill A: The Classic T-Drill
This is the ultimate test of forward, lateral, and backward movement.
- Setup: Place four cones in a "T" shape. The base cone is 10 yards from the middle cone, and the two side cones are 5 yards from the middle.
- The Move: Sprint forward to the middle cone, shuffle sideways to the left cone, shuffle all the way to the right cone, shuffle back to the middle, and backpedal to the start.
- Goal: Focus on staying low and keeping eyes up.
Drill B: Pogo Jumps
Perfect for building "bouncy" athletes.
- The Move: Keep legs straight (but not locked) and jump using only the ankles.
- The Coaching Cue: "Think of your feet like pogo sticks hitting the ground quickly!"
- Volume: Perform 3 sets of 10-15 seconds of work.
Drill C: The "Rabbit" Reaction Run
- Setup: Two athletes stand side-by-side. One is the "Rabbit," and the other is the "Hunter."
- The Move: The Rabbit starts running in any direction. The Hunter must shadow them as closely as possible.
- Goal: This builds game-speed agility where they have to react to an opponent, not just a cone.
5. Frequency and Volume: How Much is Too Much?
One of the biggest mistakes new coaches make is overworking their athletes. Agility training is about quality, not quantity.
- Frequency: 2–3 times per week is plenty for youth athletes. Their nervous systems need time to recover.
- Duration: Keep agility-specific work to 20–30 minutes within a larger practice.
- Recovery: For every 10 seconds of high-intensity work, allow at least 30–60 seconds of rest. If they are gasping for air, their form will break down, and they won't learn the movement correctly.
6. Common Mistakes to Watch Out For (Red Flags 🚩)
Keep an eye out for these form errors to prevent injury and ensure your athletes are actually getting better:
- Heel Striking: If you hear a "thud" when they land, they are hitting the ground with their heels. Encourage them to stay on the "balls of their feet."
- Looking Down: Kids love to look at their feet in the agility ladder. Encourage them to keep their "eyes on the horizon" so they develop spatial awareness.
- Rounded Backs: When changing direction, many kids bend at the waist. Teach them to "sit back" into their hips to stay balanced.
- Lack of Arm Drive: Running isn't just about legs! If their arms are floppy, their speed will suffer. "Pocket to Chin" is a great cue for arm movement.
7. Frequently Asked Questions
Q: Can I use gym equipment for agility?
Absolutely! While field training is great, you can use a Wall Mount Hook and suspension trainers to build the core strength needed for stability during direction changes. Check out our gym collection for more ideas.
Q: My kid is "clumsy." Will agility training help?
Yes! Clumsiness in youth is often just a lack of "neuromuscular control" (the brain-to-muscle connection). Ladder drills are perfect for "re-wiring" that connection.
Q: At what age can they start using resistance bands?
Generally, around age 10-12, once they have mastered basic movements with their own body weight. Start with light Resistance Bands and focus on form first.
Your Action Plan for Next Practice
You don't need a massive budget or a professional stadium to build great athletes. You just need a bit of consistency and the right football training gear.
Here is your 3-step challenge for this week:
- Pick one tool: Grab a set of cones or a speed ladder.
- Focus on one cue: For the whole session, just focus on "staying on the balls of your feet."
- Make it a game: Turn the last 5 minutes into a fun agility-based tag game.
Coaching is a journey, and you’re doing a great job by simply being there for the kids. Keep it simple, keep it moving, and most importantly, keep it fun! 🏆
Ready to gear up? Explore our full range of Team Training Equipment to find everything you need for a successful season. If you need more drill ideas, don't forget to grab our Training Ebooks for step-by-step guides!


